
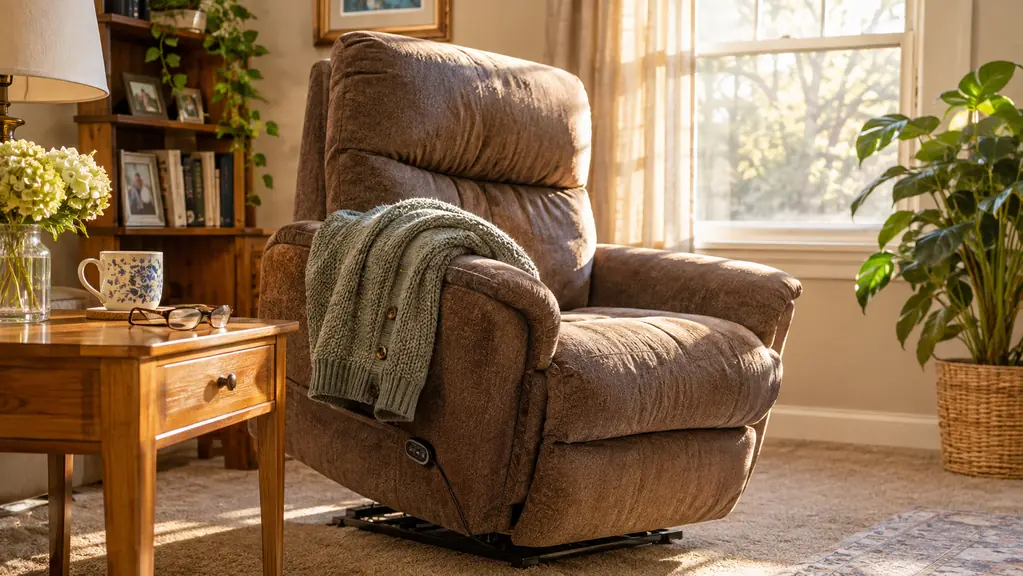
Ray's lift chair sits about four feet from the wall outlet, and for the first two months the armrest was covered with a folded fleece blanket. It looked like what it was: a blanket on a chair. It slid every time the lift motor raised him, and by the end of the week it was in a heap on the floor with the remote buried somewhere in it. I spent twenty-four years of my working life in other people's living rooms, and I have seen that same blanket on a hundred chairs.
So here is the walkthrough I wish someone had given me: how to put a cover on a lift chair so it stays put through the lift, the recline and the getting-up. The one I use at home is the H.VERSAILTEX stretch recliner cover, a one-piece stretch cover that goes on like a fitted sheet and stays where you put it. It is not upholstery and it is not pretending to be. It is a washable layer between a chair you cannot easily replace and the coffee that is going to land on it. The whole job takes about ten minutes, and one of those minutes is you sitting down afterward, out of breath, feeling pleased with yourself.
A cover you can wash beats a blanket you keep re-folding
The H.VERSAILTEX one-piece stretch cover is built for power lift recliners with a back circumference of 78 to 88 inches and a seat width of 24 to 33 inches. Measure yours before you order, then take ten minutes and be done with it.
Amazon Check Today's Price on Amazon →Step 1: Measure the chair, because this is where most people get it wrong
I have measured a lot of chairs with a cloth tape and a bad attitude, and I will tell you the two numbers that decide whether a cover works: the circumference around the back and the width across the seat.
For the H.VERSAILTEX cover, the back circumference needs to fall between 78 and 88 inches, and the sitting width between the arms needs to be 24 to 33 inches. Run the tape around the widest part of the chair back, starting at the seat on one side, up over the top, and down to the seat on the other side. Then measure straight across the seat cushion between the two armrests with the chair in its normal sitting position, not while it is lifted. Write both numbers on the back of an envelope and keep it, because you will want it again if you order a second cover.
The first time I measured a chair for a cover I did it with the chair reclined, because that is how it was sitting when I walked into the room, and I came up four inches short on the circumference. The tape has to go around the back with the footrest down and the chair sitting upright. I still use the same cloth tape I bought in 1998. It has a knot tied at the twelve inch mark where it frayed, so I always start from the metal end and never from the knot, and I read the number twice before I trust it.
If your chair lands outside those numbers, stop reading and keep looking. A cover that is too tight will fight every seam the first time the lift motor runs, and one that is too loose will bunch under your back every time you sit down. Neither of those is a story you want to be telling me at Thanksgiving.
Step 2: Unplug the chair and run it out flat
Unplug the chair from the wall before you start. I am serious about this one, and not because I am fussy. You are going to be leaning over the back of the chair with both hands behind it, and in our living room the outlet is directly behind the recliner where nobody can see it. Pull the plug, then run the chair out.
One more thing about that plug. I leave it lying out on the carpet where I can see it the whole time I work, because the second time I did this job I plugged the chair back in halfway through to check the footrest and gave myself a genuine fright when the frame moved with my hand still inside it. Out of sight is out of mind, and out of mind is how people get hurt.
By out, I mean raise the footrest and lay the back down until the chair is as flat as it goes. Two reasons. First, a flat chair gives you slack in the fabric where you need it, so the seams sit where you can actually reach them instead of buried in a corner. Second, the chair is not going to shift under you while you work, so you are not chasing it around the room with a piece of fabric in your teeth.
If your chair is tight against the wall, pull it out three or four feet. You will want to walk around the back of it at least twice. Our living room is about 12 by 14 feet, and there is just enough room if you clear the middle of it first. If you are doing this for a parent who lives alone, do the pulling yourself and do not let them help. This is not a job for someone with a bad back and a good attitude.
Step 3: Find the back of the cover and drop it over the chair back first
The cover is one piece, so there is a right way up and a wrong way up, and the difference is which end goes over the back of the chair. Find the deepest section of fabric, the part that is going to drop down behind the seat back, and start there. Hold it up over the top of the chair back and let gravity take it down.
Now work it down the back a hand's width at a time, the way you would put a fitted sheet on a mattress. Do not yank it in one motion. The fabric is 85 percent polyester and 15 percent spandex, so it will give, and the giving is the whole point. Yank it and you stretch the wrong section, and the seat ends up short on one side with no way to fix it except starting over.
Get the back looking right before you touch anything else. If the back seam is crooked, everything below it will be crooked too, and you will spend twenty minutes fighting a cover that was never the problem. The first time I did this it took eleven minutes just to get the back seated, because I kept trying to smooth the front half before the back half was down. Back first. Always the back first.

Step 4: Work the seat and the arms down, and do not skip the loops
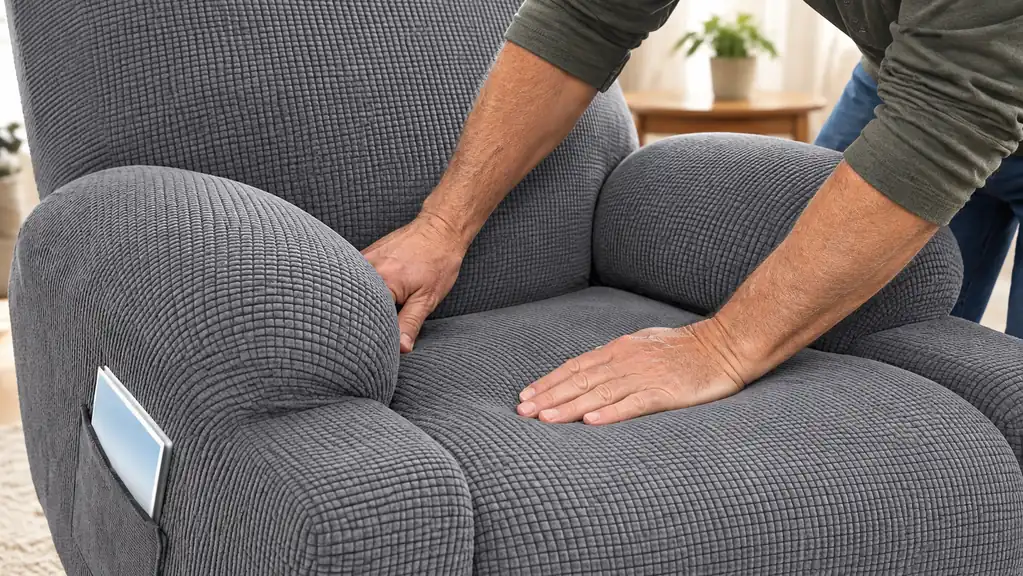
Once the back is down, work the seat and the arms. Start at the top of one armrest and press the fabric down into the gap between the arm and the seat cushion, using the flat of your hand rather than your fingertips, because fingertips get pinched and you will only do that once. Start with the armrest furthest from the wall. On our chair that is the left one as you face it, which leaves you room to walk around and pull the fabric from behind instead of reaching across your own body and fighting your own elbow.
Then smooth the seat from the back toward the front, pushing the extra fabric into the two gaps where the seat meets the arms. This cover has arm rest coverage, so the arms get wrapped too, and the arms are where fabric wants to creep and wrinkle first.
The seat section has two elastic loops at the back corners. Pull those down and back so the seat fabric sits tight instead of sliding forward a little more every time the chair lifts. This is the step people skip, and it is the reason a cover that looks fine on day one looks like a rumpled shirt by Friday. It takes fifteen seconds and it is the difference between a cover and a decoration.
Last, find the side pocket and decide which side you want it on before you smooth everything flat. For us it is the right side, because that is where the remote lives, and the remote has gone missing exactly once, which was once too often.
Step 5: Plug it in and run the chair through the whole range before you call it done
Plug the chair back in and run it through the full range with the cover on. Footrest up, footrest down, back reclined, back upright, all the way up on the lift and all the way back down. Watch the fabric at the two places it will always move: where the seat meets the back, and where the footrest folds.
Every cover shifts a little on the first run. That is normal and it is not a sign you did it wrong. What you are looking for is a cover that stays seated, meaning it does not pull up out of the gap at the back of the seat and does not wad up under your legs. If it does, unplug it, take the seat loose and pull the back down another inch.
If a spouse or a caregiver uses the chair, run it twice with them in it. Weight changes how the fabric sits, and a cover that is fine on an empty chair can be tight across the seat with a person in it. Ray is 5 foot 11 and broad through the shoulders, and I learned to test with him sitting in the chair instead of testing it empty and calling it good.
When it needs washing, and it will, it goes in the machine. Cold water, gentle cycle, air dry or low heat. Do not throw it in with the towels, because the loops catch on terry cloth and the elastic gives up faster than it should. One wash a month is plenty unless somebody has been eating in the chair.
What Else Helps
If you are setting a chair up for a parent who lives alone, do the cover first and then spend five minutes on the rest of it.
The remote needs a home. The side pocket on the cover helps, but the remote also needs to be reachable without leaning forward, because leaning forward to grab a remote out of a lift chair is how people end up on the floor. Pick a pocket or a small basket on the end table, and then it lives there every single time.
Check the floor under the front of the chair. Our living room is carpet over a concrete slab, which is forgiving. If the chair sits on hardwood or tile, put something under the front legs. Feet need to reach the floor flat when the chair is upright, and a chair that creeps back an inch a week quietly stops letting your feet reach anything.
While the tape is still out, measure the doorway too. Our front door is 32 inches wide, and that number matters more than any cover if the chair ever has to leave the house. A power lift recliner that will not fit through the door is a chair that gets sold with the house, and I have watched two families learn that the hard way on moving day.
And buy a second cover if the budget allows. Not because the first one fails, but because the whole point of a washable cover is that you wash it, and a chair that sits bare for an afternoon of drying is a chair that gets a blanket thrown back over it. That is how the blanket comes back, and we are not doing that again.
Two numbers decide whether the cover works: 78 to 88 inches around the back, and 24 to 33 inches across the seat. Everything else is guesswork.
Measure, unplug, ten minutes, done
The H.VERSAILTEX one-piece stretch cover fits power lift recliners in the 78 to 88 inch back range and the 24 to 33 inch seat range, with a side pocket for the remote and elastic loops that hold the seat where you put it. Machine washable, and it goes on without a fight.
Amazon Check Today's Price on Amazon →